
Push Puppets - Matching Pairs

Push Puppets - Battling with Bronco Bill
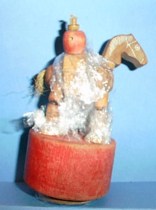
This poor little chap needs a new head, arms and a hat. His general condition is poor and the wood in need of some "nourishment". I think it was originally a Bronco Bill and will try to restore him to his former glory - well some of his former glory.
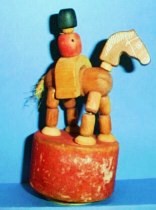
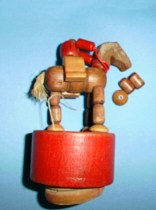
First step is to clean the wood - there are traces of what looks like old newspaper or it could be plaster around the base and horse's legs. Check out that "hat" - it needs to go.
Where possible, I try to avoid re-stringing a puppet unless it is absolutely necessary. He does stand a little wonky but this is quite normal for the older wooden push puppets - the strings seem to get stretched over time.
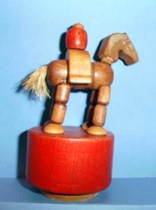
All cleaned up now - and ready for a wax. I lightly washed and scrubbed the base to remove the paper/plaster residue.
Next step is to rub red wax into the base, remove and re-position the clingwrap, wax the hooves, re-position the clingwrap, wax the legs, re-position the clipwrap - you get the picture ?
Ah well - it happens - just a little too vigorous rub-down obviously.
So now I do need to re-string him - perhaps I will sort out the "tilt" while I am at it. Shouldn't be too difficult to do as the "knot" securing the strings will be threaded through a small disc bead and then countersunk into his new head. If the string on the other legs had snapped then I would have needed to remove the horse's neck, make a new neck, drill into the horse's head and then re-assemble - serious surgery...
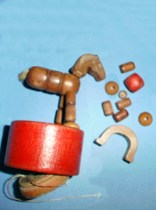
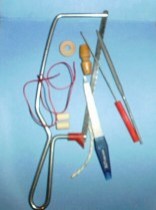
As that famous song goes - "these are a few of my favorite things" - a hacksaw, nail files, needle files, string, wire, duffle coat beads, beads made from dowel (I drill holes through the dowel using a small hobby drill).
The red flexible modelling wire will be used to string through the puppet's arms and secured round the horse's neck. Normally the original would have used red waxed string - but after several attempts at "stringy-dipping" I gave up on this idea - as most of the wax seemed to break away/off immediately.
The flat round bead will make the brim of the hat and the duffle coat button will make both the cowboy's head and the peak of his hat.
Ok - so we are finally getting there - slowly.
I decided to replace the tail as the other one was just too beat up. The new one is made from sisal (?) coarse string dipped in a cup of black tea, followed by a cup of cold black coffee - with a little rinse and brush up it looks fine - and the coffee didn't taste too bad either...
The head was made from the bottom part of the duffle coat button and sanded down. The facial details were drawn using black pigment based ink and the whole thing was lightly waxed to match the chaps and horse's hooves.
The arms were made from dowel and sanded at each end to round off the flat edges. They were then "roughly" painted and "aged" to match the color of the cowboy's torso and then finally given a light coat of wax.
Not happy with head though - looks a tiny bit too small - think I'll chop it off and start again - OFF WITH HIS HEAD !!
Ever get that "Deja Vu" feeling...
Unfortunately, when removing his head I accidentally chopped the knot which had been countersunk into his head - the whole thing fell apart again...
You need lots of fingers and thumbs when re-stringing and I find it easier to hold the baseplate in position with a couple of very small plastic clamps and two pieces of folded cardboard. This allows me to press the button further up inside the pedestal, then clamp with the cardboard against the button and the top of the base. This way it leaves a little "slack" and the base drops slightly when the clamps are removed...... never mind though - I am getting used to this re-stringing business now....
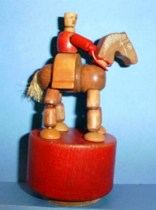
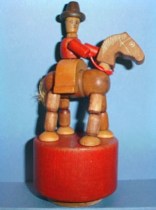
All done - head replaced and facial details redrawn. Hat and peak glued together and painted a murky shade of brown - followed by - yes - another wax !!
He is ready now to ride off into the sunset - well off to a spare space on my shelf ...
1999-2009 ©www.pushpuppets.com - All Rights Reserved